This Golden Powerhouse of Healing Needs a Little Help From a Friend.
Since ancient times, the Indian science of ayurveda has used turmeric for a multitude of healing purposes. Its popularity in the west has also risen dramatically in recent years as modern-day scientific studies confirm that this spice is indeed as effective a healing substance as its centuries-old reputation purports.(1)
Tumeric is an eye catching spice that is displayed in eastern markets in glistening golden piles. It is also readily available in western supermarkets. Both the turmeric root, as well as its powdered form, are used in food and remedies.
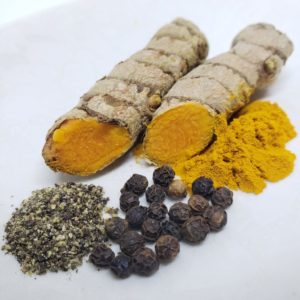 Eating turmeric in golden tea recipes, juices, or sprinkled on food is a great idea, however if you have been using this spice on its own, you may not be reaping the many health benefits that it is known for. Turmeric is bursting with compounds that have potential health benefits but it is actually very poorly absorbed into our bloodstreams. To increase the bioavailability of the medicinal properties of turmeric (curcumin), it is ideal to pair turmeric with other foods that aid absorption, such as black pepper.
Black pepper is one of the best ways to help maximize absorption into the bloodstream because it contains piperine. This substance has been shown to increase absorption of curcumin by as much as 2000 percent! (2)
There are many reasons to consider incorporating turmeric (and pepper) into your diet. Studies show that turmeric is a powerful anti-inflammatory (3) and anti-oxidant (4). It is good for your heart (5), your brain (6), has been effectively used to regulate moods (7), and ease arthritis (8). In fact the study link in this article shows tumeric to be MORE effective than the anti-inflammatory drug also included in the study, with the added benefit of having no side effects! I suspect the benefits listed here are just the tip of the iceberg. Scientists continue to deepen our understanding of the health impact of this incredible spice with each new study. It is obvious that the ancient Indian ayurvedic healers knew what they were talking about.
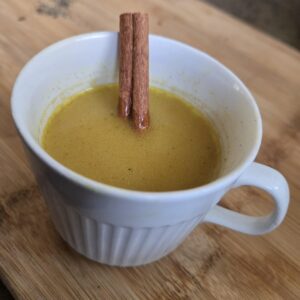
For years I have been drinking turmeric tea, and giving it to my kids in all kinds of remedies, however my new favourite thing is breakfast tumeric juice shots. If you have a juicer this is a great way to add curcumin to your diet without having to dig up new meal recipes, or change the flavour of your current favourite foods (however I do recommend you try adding it to your cooking, it is yummy!).
The photo above has a recipe for the breakfast shots I juiced up for my family to shoot back yesterday as they were going out the door. You can use any combination of ingredients to suit your taste.
Just don’t forget the pepper.
Enjoy!
1. J Nat Sci Biol Med. 2013 Jan-Jun; 4(1): 3–7. Role of curcumin in systemic and oral health: An overview.
Monika Nagpal and Shaveta Sood1
2. Planta Med. 1998 May;64(4):353-6. Influence of piperine on the pharmacokinetics of curcumin in animals and human volunteers.
G Shoba 1, D Joy, T Joseph, M Majeed, R Rajendran, P S Srinivas
3. Altern Med Rev. 2009 Jun;14(2):141-53. Anti-inflammatory properties of curcumin, a major constituent of Curcuma longa: a review of preclinical and clinical research. Julie S Jurenka 1
4. Adv Exp Med Biol. 2007;595:105-25. Antioxidant and anti-inflammatory properties of curcumin.
Venugopal P Menon 1, Adluri Ram Sudheer
5. Int J Cardiol. 2009 Apr 3;133(2):145-51. The protective role of curcumin in cardiovascular diseases.
Wanwarang Wongcharoen 1, Arintaya Phrommintikul
6. PLoS One. 2012; 7(2): e31211.Published online 2012 Feb 16. doi: 10.1371/journal.pone.0031211. Curcumin Enhances Neurogenesis and Cognition in Aged Rats: Implications for Transcriptional Interactions Related to Growth and Synaptic Plasticity.
Suzhen Dong,# 1 , 2 Qingwen Zeng,# 1 E. Siobhan Mitchell, 3 Jin Xiu, 4 Yale Duan,# 1 Chunxia Li,# 1 Jyoti K. Tiwari, 5 Yinghe Hu, 1 , 2 Xiaohua Cao, 1 , * and Zheng Zhao 1 , *
7. Phytother Res. 2014 Apr;28(4):579-85. Efficacy and safety of curcumin in major depressive disorder: a randomized controlled trial.
Jayesh Sanmukhani 1, Vimal Satodia, Jaladhi Trivedi, Tejas Patel, Deepak Tiwari, Bharat Panchal, Ajay Goel, Chandra Bhanu Tripathi
8. Phytother Res. 2012 Nov;26(11):1719-25. A randomized, pilot study to assess the efficacy and safety of curcumin in patients with active rheumatoid arthritis.
Binu Chandran 1, Ajay Goel
Healthline has a great article that links to many more studies. Find at this link to 10 Proven Health Benefits of Tumeric and Curcumin


 With Additional Tweaks For Fall Season!
 Recipe:
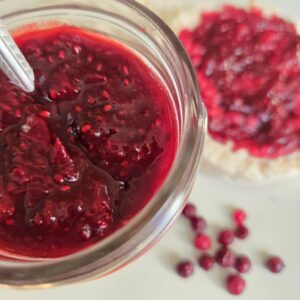 Chia Jammin!
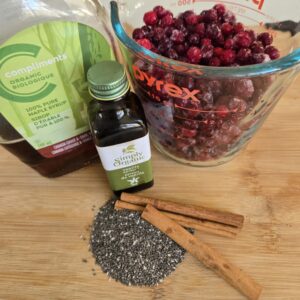 You can use any berries with this recipe but this is the recipe I made this morning.
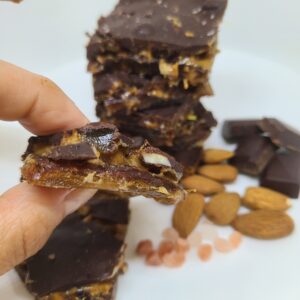 The approach of Autumn brings not only a change in weather but also a shift in lifestyle pace. From an ayurvedic (ancient Indian medicine) perspective both of these things increase vata energy, which has the characteristics of movement, and deficiency. This no-bake, easy to make, lunch box treat is sure to keep you nourished and grounded as September begins. They do have nuts though so will not work for elementary school lunch box treats, but that just means more for you!
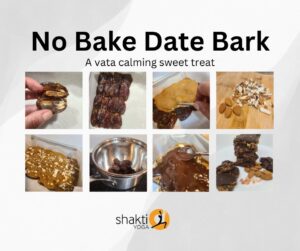
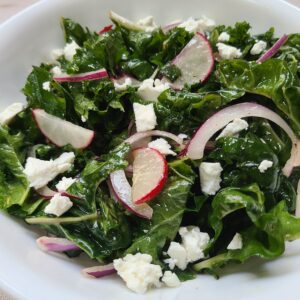 For many kale is known as a vegetable eaten mostly because we are told it is good for us. I will admit that I too used to feel this way. At least I did until I was introduced to massaged kale salad. Up to that point if I found that Kale had somehow made its way into my refrigerator, I usually made it into Kale chips. Which are yummy but can’t really be called a full meal, despite the fact that I may have done just that once or twice.
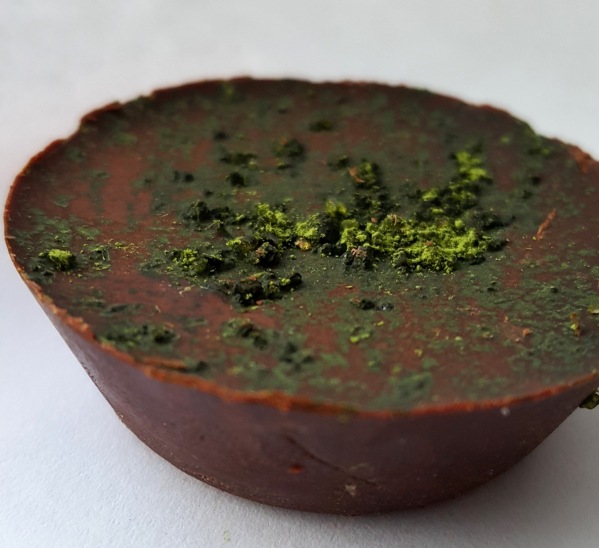 This year I have decided to eat more chocolate. Well actually not more. Anyone who knows me, also knows that I have actually been pretty unrestricted in this area for some time now. What I have decided to do is upgrade my stash. You might assume that I am talking about eating dark chocolate, and that would be true, however my usual chocolate is already 70% cocoa solids, organic & free trade. In fact I am fond of telling anyone who questions the magnitude of my consumption that eating this chocolate is one of the ways that I serve humanity, because altruism is, you know, just my thing.
 I was introduced to ghee when my mother and I were on our first Indian backpacking trip. Mom had some scratches on her legs that were getting sorer and more worrisome by the week. We were staying at an ashram and the morning prayers had just been done with a purifying fire ritual. When our teacher saw my mother’s legs he exclaimed, “That has to be treated now!” He promptly pulled some burnt, ghee-soaked, coals out of the ceremonial fire ashes, ground them between his fingers, and explained that the holy healing properties of ghee, further purified by fire and morning prayers, would be the most powerful remedy possible. We were doubtful, but had already tried all of our travel pharmaceuticals, and so she rubbed this black, greasy powder all over her angry wounds. As you are probably by now expecting, the cuts promptly healed and disappeared. It was only later that we learned, in addition to being an integral part of traditional Indian healing practices, ghee is also an Indian cooking staple.
 u will be able to see all the way to the bottom of the pot. The ghee will have become translucent.


